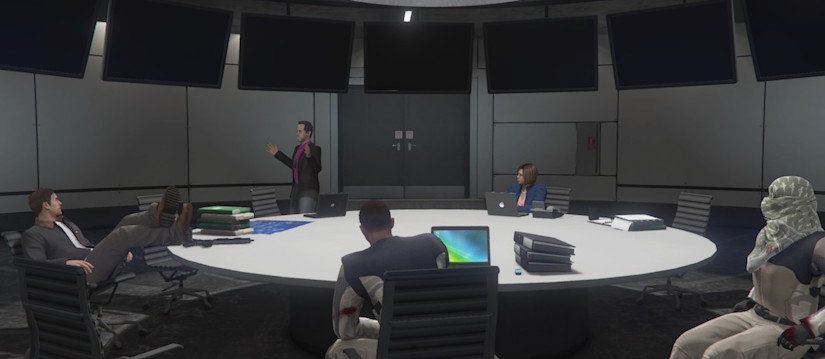
The Doomsday Heist is the most comprehensive and one of the most challenging heists in GTA V Online with a total of three acts plus the finale. Each act escalates in intensity and difficulty as you progress towards the finale. Both acts contain its own unique set of preperations and setup missions leading up to the finale heist.
This walkthrough will assist you in completing all of the missions in Act 1 'The Data Breaches in a streamlined fashion with additional suggestions to help you complete the missions efficiantly as possible.
To get the ball rolling you will need to own a Facility. This property will let you setup the heist and execute the missions. There are 9 different locations to select from with the price ranging from GTA$ 1,250,00 in Paleto Bay to GTA$ 2,950,00 at Land Act Reservoir.
To purchace the Facility navigate to Maze Bank Foreclosures and select the property that best fits yours needs. All heist missions, upgrades and modifications are the same so consider your budget and work flow as your main parameters for purchasing the Facility.
After you have bought the facility, you will receive a call from Lester to set up the heist. Initally you will progress through the Acts in a linear fashion but once you have succesfully completed Act 3 you have the option to replay the acts in any sequence.
It takes money to make money as the saying goes. Listed below are the setup costs for each act:
Act Setup Cost:
- Act 1 - The Data Breaches GTA$ 25,000
- Act 2 - The Bogdan Problem GTA$ 95,000
- Act 3 - The Doomsday Scenario GTA$ 125,000
This walkthrough will guide you through all of the preperation and setup missions in Act 1. Once you have completed the prep mission, you will gain access to the setup mission and after your finish all of the setup missions, you will gain access to the heist.
The prep missions are soloable but the setup missions and finale for each act require a minimum of 2 players and can be a maximum of 4 players.
Contents:
Prep 1 - Paramedic Equipment
The first prep mission is cookie cutter. In the standard GTA fashion, retreive the ambulance and return it back to the facility.
The mission starts by giving you the location of the ambulance and your objective is to obtain and bring it back to the facility. If you are looking to save some time you can instead have the ambulance brought to you by accessing your phone, going to emergency services by dialing 911 and selecting paramdeic. Once the ambulance is on the scene, take it and bring it back to the facility. Nice job cutting back on your greenhouse gas emissions, you're an example to live by!
Setup 1 - Dead Courier
This setup mission is slightly more involved as there are two teams. One will be the paramedics and the other will be piloting a helicopter.
The paramedics team will go to the coroner's office. Search the cadavers in the morgue for a USB Stick. You will discover the requested item is not there and you will need to go upstairs and search the laptop for the data. Take care when reaching the top floor as you will need to fight your way to the laptop.
After you have cleared a path to the laptop and secured the data you will need exit the building by retracing your steps, once again fighting your way to the extraction point.
Once you're out, jump into the closest vehicle and make your way to a clearing so team 2 can safely land and get you out of there. Make your way back to the facility to complete the setup mission successfully.
Prep 2 - Deluxos
For this prep mission you will need to steal four Deluxos. You will encounter resistance, so dress to kill...
Note: After you steal the Deluxos you will generate a global signal, so we recommended completing this mission in a private server unless you want the attention of the entire public server.
Head to the area where the Deluxos are being stored. This will be a semi-randomly generated masion in either the Richman, Rockford Hills, or Vinewood Hills area.
Once you arrive you will find the mansion is covered with security guards. Kill them all. One of the security forces will be carrying a key to the garage where the Deluxos are being stored. Pro tip: Bring an armored and or weaponized vehicle to eliminate the security guards quickly. The Armored Kuruma or the Buzzard are cheap and highly effective examples.
Once you have obtained the key off the security guard, unlock and enter the garage. Have your weapon ready, there are three more security guards waiting for you on the inside. Steal a Deluxo then head over to LS Customs to alter the color. After the modification, drop it off back at the facility.
Rinse and repeat until you have returned all four Deluxos. Mission complete.
Setup 2 - Signal Intercepts
For this setup mission, you and your team will get to use your newly aquired Deluxos to locate and hack some moving targets. The first four marks are vans that are scattered around the city. Approach the vehicles with caution as you will experience return fire. Stay within range to complete the hack. After you complete the hack, destroy the van and move on to the next target.
Pro tip: Stay in front of the van to avoid taking any fire. Or consider an armored vehicle like the Armored Kuruma to get the job done easily.
Next, you will need to hack four additional targets but this time you will be targeting four boats. Switch to hover mode and get after it. After you complete the hack, destroy the boats as well.
Last but not least, after you finish off the four boats, you will need to hustle over to the Los Santos International Airport and hack the airplane that is taking off. Your Deluxos now receives the ability to fly so take off after it and stay within range to complete the hack. You will encounter some enemy helicopters so it is recommended one team stays on the plane and the other destroys the choppers. After the hack is complete, take down the plane and return the Deluxos to the drop off point to wrap up the mission.
Prep 3 - Akula
This prep mission goes alot easier if you have an escape vehicle with flying capabilities. Additionally, You will encounter heavy resistance so stack up on snacks and armor.
Head to Fort Zancudo and make your way inside of the control tower. Pro Tip: Park your escape aircraft outside of the door as you will need it shortly.
Once inside, go to the top floor and download the flight data to receive the location of the Akula helicopter. During the hack, your cover will be blown and you will need to fight your way out, backtracking the way you entered. Dispatch the guards and advance forward until you have reached your aircraft for an easy exit.
Proceed to the location of the Akula and aquire it. It has a small company of guards protecting it. Take them out, bring er' home and drop that chop back off at the facility. On your return trip to the facility you will need to lose the cops. Ignore the pigs, they might be able to fly but they are much slower than the Akula and you can run donuts around them.
Setup 3 - Server Farm
This setup mission is a breeze up until the hacking sequence. Again, stack up on snacks and body armor.
Team one and two both need to make their way to the N.O.O.S.E. headquarteres in the Akula and land on the roof. After you land, head down the ladder and enter the building. Careful not to alert the guards below you.
Once you're inside, head to the left and take out the guard and camera. Headshots and suppresors are your friends here as you will want the element of surprise. This will involve some synchronization with your teammates when you encouter pairs of guards. Continue forward silently taking out the security forces as you make your way to servers.
For the next step, you will need to take cover and wait for the head of security to reveal themselves. He will come out accompanied by a security guard. After you have killed them both, take the access code off of the head of security's body. Proceed forward taking out any guards and cameras you encounter entering the building via the Server Farm entrance.
Once inside, you will need to access the four server terminals and hack them. Team 1 takes the servers to the east and team 2 takes the servers to the west.
Once you're inside, you will need to sneak to the four servers and hack them. There are two servers to the east and two servers to the west.
You and your accomplice should split up into two teams. Divide and conquer, staying in stealth and minding the guards and cameras along the way.
Once you reach your target, start the hack. You will need to match the nodes to find the correct sequence. Any successfull connections will be retained and incorrect pathways will be reset. After four failed attempts the guards will be alerted and you will lose the element of suprise. Pro Tip: If you're about the fail after three attempts, exit the hack and restart. You will lose all succesful connections and the slate will be wiped clean but so will your hacking attempts. The new puzzle is randomized so you are back to square one.
After you complete the hacking minigame, the base is alerted to your presence and you will take some heat. Make your way to the exit in the middle of the building by heading back the way you came but staying along the sides sticking close to the walls. This will minamize the damage you take as you escape the premises. Make sure to take out any direct threats along the way.
Once both teams have made it out, you will encounter heavy resistance so clear them out with any heavy artillery and make your way to the Akula when the path is clear.
Head up the ladder, back up to the roof and bug out in the Akula. Finally, fly back to the facility to complete the mission.
Act 1 Finale - The Data Breaches
The act 1 finale is arguably easiest of the three if you are properly prepared and stay frosty. To secure an easy victory, bring an armored vehicle. The Armored Kuruma once again shines here.
Team 1 and 2 will head to the facility. Once you have arrived you will need to eliminate all hostile forces. Secure the perimeter and enter the facility.
Once inside, you will need to clean house and take out the intruders before progressing. Stick and move, check your 6, and stay on your toes.
Proceed forward and head down the stairs making your way to the interrogation room killing any opposition you encounter along the way. Expect heavy resistance during this segment of the mission.
After clearing the area, keep descending to the bottom floor and continue to clean house. Once finished, you will need to go back to the interrogation room floor and make your way through the double doors into the War Room.
Once inside, jump on one of the gun cameras to gain access to the missile turret. I think you can figure out the rest. Note: Mind the IAA Defense's health bar, if this drops below the threshold its game over. Once you deal enough damage, the enemy will start to flee.
At this juncture you have successfully completed Act 1 of the Doomsday Heist.


