Image credit: GTA Boss Source: GTA Boss
Kortz Center Heist Finale Walkthrough: Every Entrance, the Vault, and the Escape
Follow @gtabossgg on X for weekly updates and guides.
Follow on XThe Kortz Center Heist finale is a night raid on the Kortz Center museum: get in through one of four entrances, work down to the basement vault, swap the weekly primary painting for a counterfeit, fill your bag with art, and get out to your buyer. Beating it comes down to three systems: the stealth economy (witnesses and CCTV footage bleed value out of your take), the basement gauntlet (a fingerprint hack, a code terminal, a laser grid, and the vault keypad), and the escape you planned on the board.
Work in progress: this walkthrough is research-based while we run the finale ourselves. Our own captures, tested payout screens, and route maps will fold in as they land, and anything that changes gets corrected here first.
This guide covers the finale only. For the planning board, every prep mission, and the scope out, see the complete prep and scope-out deep dive; for requirements and the weekly painting rotation, start with everything you need to know about the Kortz Center Heist.
On this page
Kortz Center Heist Finale at a Glance
Kortz Center Heist finale | Details |
|---|---|
Players | 1–4, fully solo-viable |
Primary payout (first weekly run) | GTA$ 1,218,000–1,925,000 |
Primary payout (standard) | GTA$ 304,500–481,250 |
Secondary loot pool (fully scoped) | Up to roughly GTA$ 2,677,500 on the board |
Launch fee | First run free, GTA$ 100,000 per replay |
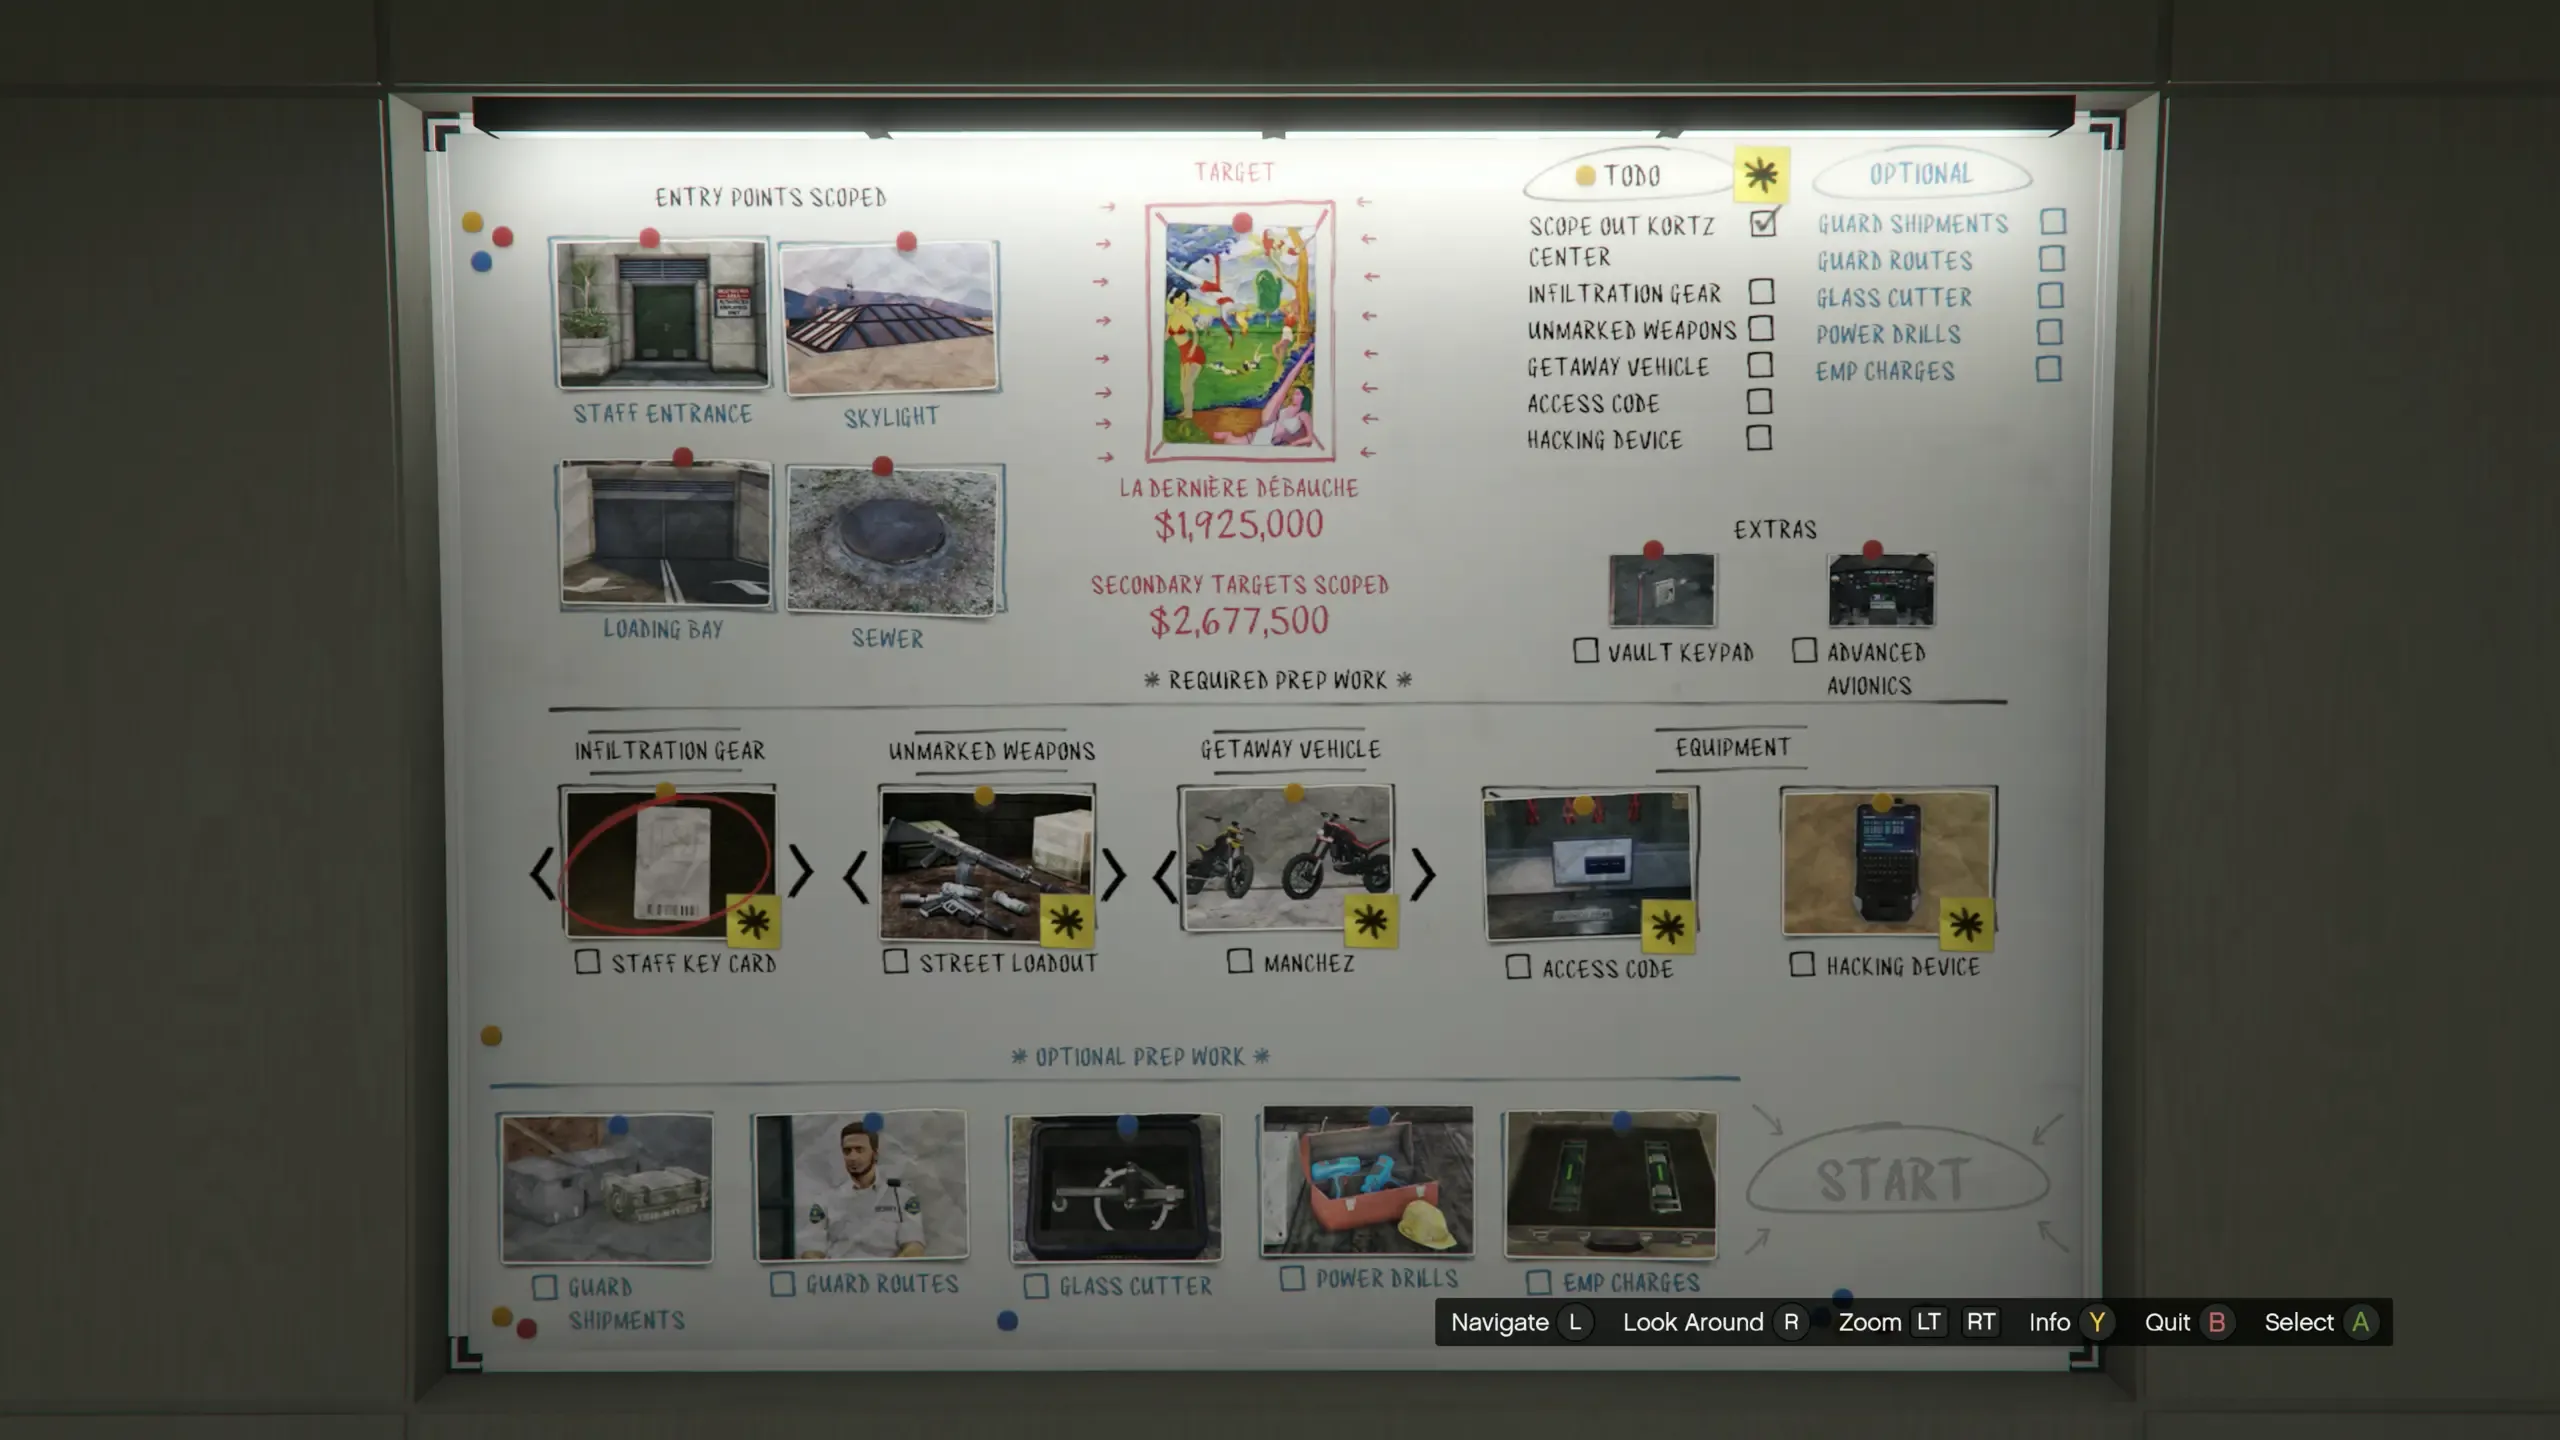
Entrances | Staff, Loading Bay, Sewer, Skylight |
Getaways | Manchez (rear), Annihilator Stealth (roof), Armored Caracara (car park), or none at all |
Elite challenge | GTA$ 50,000 normal, GTA$ 100,000 on hard |
Delivery | Alec's lockup in Cypress Flats |
Before You Launch
The finale starts from the planning board in your mansion's Art Studio, with Raf on the phone as your handler. Before the START option means anything, make sure of four things:
Both Equipment preps are done. The Access Code and the Hacking Device are mandatory. The code opens the reinforced basement door, the device opens the vault.
Your entrance is unlocked. The entrance is the host's choice at launch, but only entrances whose Infiltration Gear prep you finished are pickable: Staff Key Card for the Staff Entrance, Tactical Equipment for the Skylight, the Alpha Mail Disguise for the Loading Bay, and the Hazmat Suit for the Sewer.
You pick equipment and loadout at the start. The finale launch screen is where you commit to the entrance, loadout, and getaway you prepped. What you did not prep is not on the menu.
Your own weapons stay home. Personal weapons are unusable in the finale. You carry the unmarked loadout you prepped, nothing else.
If any of that is news, run through the prep and scope-out guide first; the board decisions there are most of the finale's difficulty. New to the heist entirely? The overview covers requirements and how the weekly primary painting rotation works.
How the Finale Flows
Every entrance funnels into the same spine. The Kortz Center interior is three exhibition levels plus a basement, and the basement is where the job happens:
Infiltrate through your chosen entrance, at night.
Reach the basement. Staff and Skylight start you on the upper exhibition level with a descent ahead of you; Loading Bay and Sewer start you at or near the basement.
Crack the CCTV server room door with the fingerprint cloner hack.
Enter the access code from your prep at the terminal to open the reinforced door.
Cross the laser grid room.
Hack the vault keypad, then work fast inside: the vault's thermal sensors put you on a clock.
Swap the primary painting for the counterfeit replica and load your bag with secondaries.
Escape to your getaway vehicle, or just to the street, and deliver the art to Alec at the Cypress Flats lockup.
Get spotted at any point and the run does not fail: it goes loud, police stack up outside, and you fight or sneak your way out with a reduced take unless you clean up after yourself. More on that in the stealth section.
The Four Entrances
The preps guide already crowned the Loading Bay the best pick for the heist as a whole, and nothing in the finale changes that for money per hour. But the best entrance for the Kortz Center Heist finale genuinely depends on what you are chasing: speed, the elite challenge, or the stealth awards.
Staff Entrance
The tutorialized default, and the slowest route. You badge in through the Bell Building with the cloned key card and start on the upper exhibition floor, then work your way down: through the exhibition, into the basement, fingerprint door, code terminal, lasers, vault. There is an elevator you can hack to shorten the descent. The same key card keeps opening staff doors deeper inside, which makes this the most forgiving route to learn the building on, just not the one to grind.
Loading Bay
The fastest way to the vault, and the repeat-run pick. You drive the Alpha Mail van straight into the loading bay, grab the key card near the green containers, punch it into the keypad, and you are already at the server room: fingerprint door, lasers, vault, with no floor descent at all. Fewer rooms means fewer guards and cameras between you and the money, which is exactly what you want on a farming run.
Sewer
The scenic route, and the home of the Dirty Work award. Find the manhole in the hedge maze, drop in, and follow the sewer to the Kortz Center basement, shedding the hazmat suit at the garbage bags. From there it is three guards, the fingerprint keypad, the code room, the lasers, and the vault. The suit stops the sewage from giving you away on the way in, but the route is playable without wearing it, which is what Dirty Work asks for: sewer entry, no hazmat, never spotted.
One catch that surprises people: the manhole key randomizes across five outdoor spots and has to be found again every single run. Sweep the ground-level work areas before you commit; all five spots are mapped in the preps guide's manhole key section. Grabbing the key mid-finale is possible, but hunting around outside in the open can put guards on alert before you are even in the building.
Skylight
The roof start. You rappel in through the Bell Building skylight with the Tactical Equipment and drop onto the upper exhibition level, with the whole descent ahead of you, softened by the gear's night vision and its ability to disable some cameras. This is the entrance the elite and stealth-award crowd favors: a solo full-stealth elite has been done through it. We are still mapping our own interior route from the skylight, so we will not fake a step list here; expect the exhibition-level layout, guard patterns, and descent options to fill in once our runs land.
Stealth: How Detection Actually Works
The finale runs on a stealth economy rather than a fail state. Here is the whole system:
Guard patrols are static between runs. The routes do not reshuffle, so every run you learn is knowledge you keep. Take guards down in patrol gaps, not in open sightlines.
The Guard Routes prep puts guard blips on your minimap. Worth having for any quiet run, with one caveat: the blips can occasionally fail to show up even with the prep done, so trust your eyes first.
Cameras escalate, they do not just watch. Shooting out cameras raises suspicion, and enough of it escalates from suspicious guards to backup to a full alert. Destroy cameras deliberately, not on reflex.
Disable the case alarm at the reception desk. Behind the security desk sits an alarm wired to the display cases; leave it armed and opening cases can call the police, Glass Cutter or not.
Lasers hurt, they do not fail the run. Touching a laser damages you and trips the alarm, but the mission continues.
Detection makes the run loud, not lost. Once spotted, the heist continues: police gather outside and you have to lose them to finish. The real cost is money.
Witnesses and footage are the money leak. Living witnesses and the vault CCTV footage both reduce the value of what you sell. You can claw the value back: eliminate the witnesses and wipe the footage at the computer just outside the vault before you leave.
Whether you can ever recover your undetected status mid-run is one of the things we are still confirming; assume you cannot, and treat the checkpoint trap in the bugs section as required reading before any elite or no-spot attempt.
Hacks, Minigames, and the Laser Room
There are three security layers between the basement and the vault door, plus the lasers. Two of them get confused with each other constantly, so to be clear: the fingerprint hack guards the server room, the memory hack guards the vault.
The fingerprint cloner (server room door). A Diamond Casino-style print job: assemble the fingerprint from four fragments. You get a handful of tries, around six, so slow down and match deliberately. If you brought the Tactical Equipment, thermite can breach the basement door instead, at the cost of noise you probably did not budget for on a stealth run.
The access code terminal. The reinforced door past the server room wants the 6-digit code from your Access Code prep. The code sits in your phone's message thread, so there is nothing to solve: read it, type it, move on.
The vault keypad (memory hack). The vault door runs a memory puzzle: three rounds of flashing symbol sets you have to repeat back. You get a maximum of about five attempts, and asking to replay a sequence costs you one of them. The puzzle can also re-scramble on you partway through, so commit each set to memory the first time. This is exactly what the GTA$ 450,000 Vault Keypad extra on the planning board is for: a practice replica in your mansion, so the first time you see this hack is not with a bag on your back.
The laser grid room. Between the code door and the vault sits a room of moving lasers with three deactivation panels; each panel you reach kills the lasers you have already passed. The room remaps your controls to a dedicated jump and a crouch-in-place, and it is much easier to judge the gaps in first person, so switch views before you step in. Two things to know before you improvise: you cannot eat snacks inside the grid, and a couple of laser touches can be enough to kill you, so the play is patience, not tanking. On hard mode the room appears to gain an extra low laser, with a mid-room lever that removes it; we are still verifying the details.
The Vault
The vault is a timed room. Its thermal sensors limit how long you can stay inside, and running the clock out is how clean runs die at the finish line, so give yourself at least ten seconds of margin to get back out the door. The exact timer length is not on screen and we have not pinned it down yet; owning an Agency, a Terrorbyte, or the Garment Factory appears to extend it through your contacts there, which we are also still confirming.
The primary painting hangs at the far edge of the vault. Taking it is a swap: you replace it with the counterfeit replica from your preps, and the primary travels in its own protective container, taking no space in your loot bag. Fill the bag with the vault's secondary paintings instead; four or so of the smaller vault pieces is about what one solo bag holds.
Two side notes for your route plan. The lockboxes in the vault only open if you ran the Power Drills prep, and they hold some of the least valuable loot in the building, so they are a topper, not a stop. And the museum's other locked room, on Exhibit Level 2, needs two players to open at all: solo, that loot simply is not available, and it matters for the elite challenge below.
Loot Values and Bag Math
Every player carries one bag, and gallery paintings are heavy: roughly half a bag each, with the smaller vault pieces packing tighter. In practice a solo bag holds only a few pieces, so what you grab matters far more than how much you grab. These are the value bands we can currently stand behind:
Loot type | Value band |
|---|---|
Jewelry | GTA$ 29,000–46,000 |
Eggs and statues | GTA$ 52,000–88,000 |
Small vault paintings | GTA$ 72,500–90,000 |
Meteorite | GTA$ 76,000–78,000 |
Gemstones | GTA$ 102,500–115,000 |
Top-shelf paintings | GTA$ 147,500–160,000 |
Priority is simple: top paintings and gemstones first (the most valuable canvases hang around the second-floor gallery), then eggs and statues, and jewelry only to top a bag off. Two more rules bend the math:
Damage bleeds value. Taking hits with a loaded bag chips away at the worth of what you are carrying, which is also how the elite challenge measures you.
The Buyer's Request is free money. Each run, Raf's buyer asks for three specific secondary targets, flagged with a gold money icon during the scope out. Secure the full set and you earn GTA$ 50,000 on top. One RNG trap: a requested item can spawn inside the two-player Exhibit Level 2 room, and when that happens solo, the request (and with it the elite challenge) is off the table for that run through no fault of yours.
The Escape
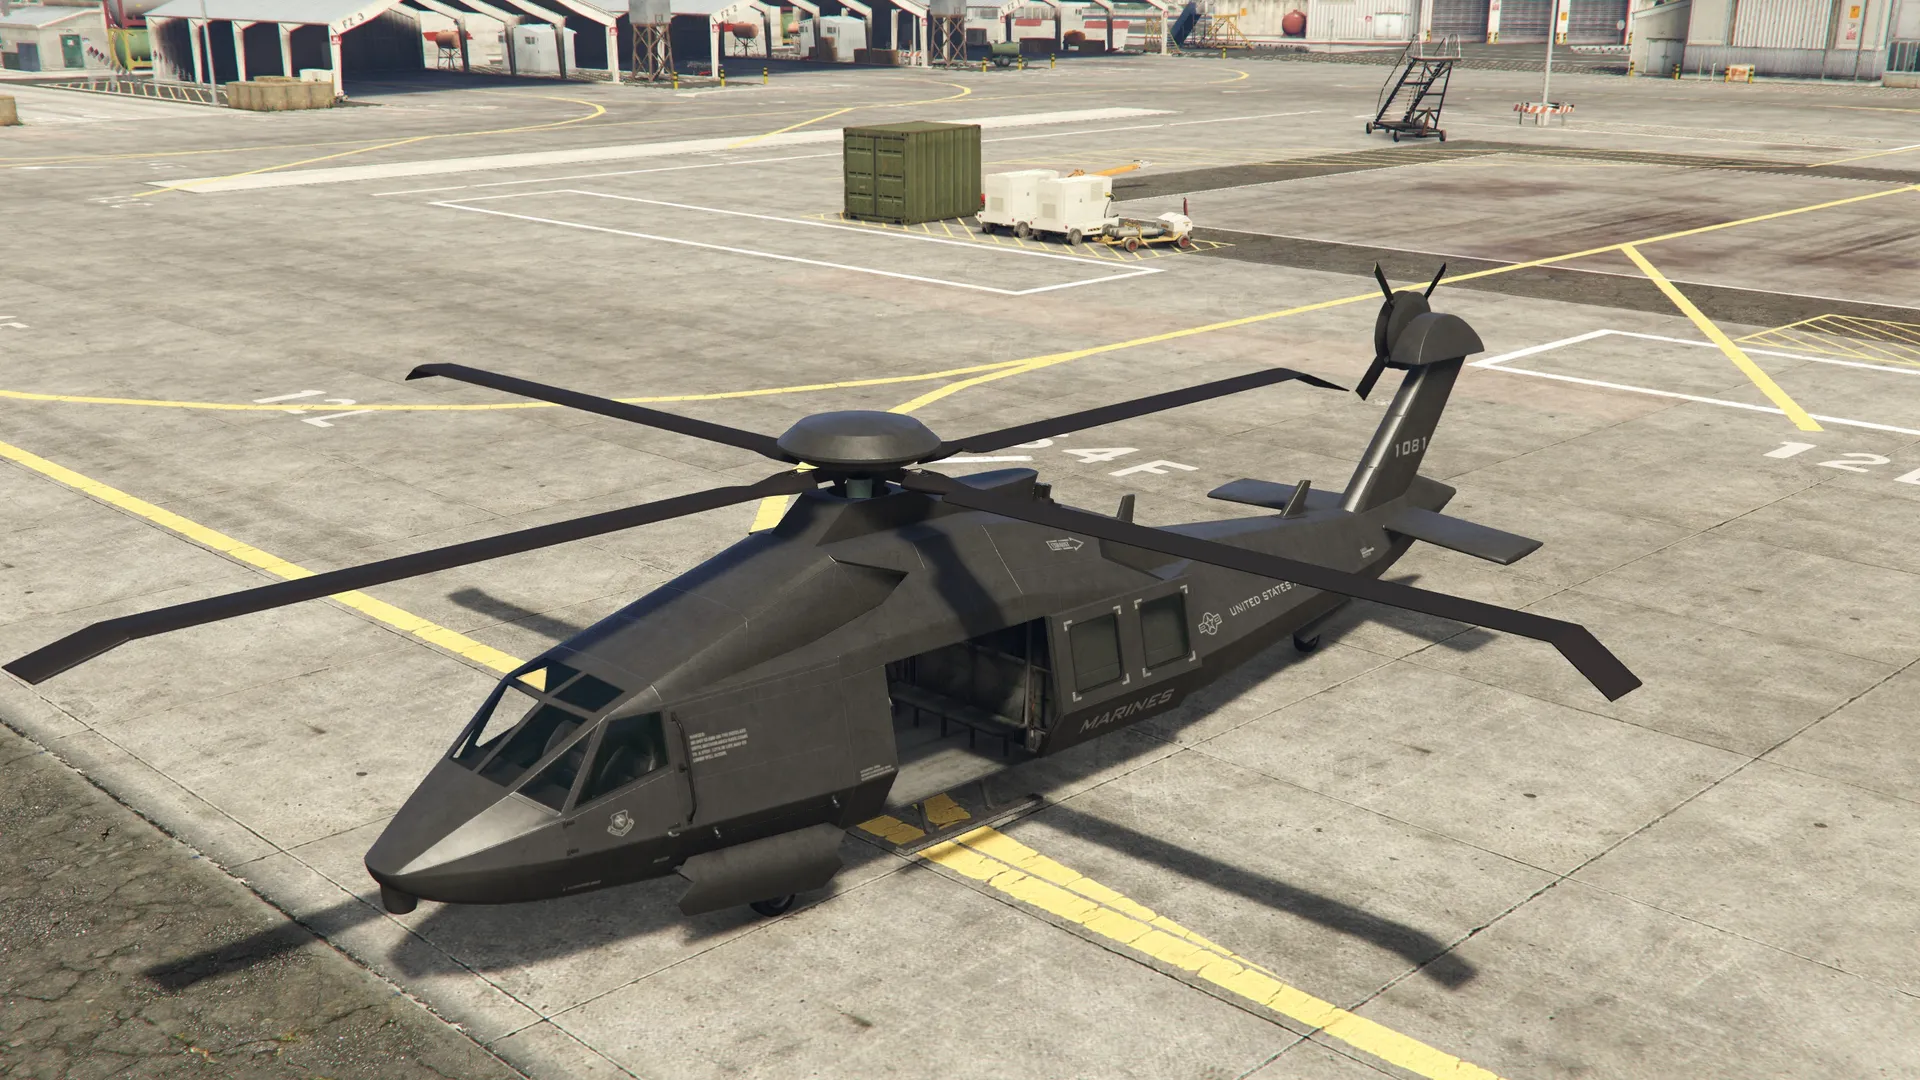
Each getaway vehicle waits at a different exit: the Manchez bikes at the rear of the Bell Building, the Annihilator Stealth on the roof, and the Armored Caracara in the car park.
The roof exit has its own little gauntlet. You need the Exhibition Room Exit Keys, lifted off guards inside, to take the clean way up; the alternative exit with the keypad is rigged to blow and alerts the police, and there is a camera covering the railing on the way that can undo a stealth run at the last moment.
About that helicopter: the Annihilator Stealth pickup is currently the riskiest exit, because the NPC pilot can crash during the extraction and sink an otherwise clean run, with or without Advanced Avionics. Until that is patched, take the Manchez or the Caracara, or skip the getaway entirely, because here is the part most guides miss: the getaway vehicle is optional. Reach the street, steal or call in any car, and drive the art to Alec's lockup in Cypress Flats. The delivery is what ends the heist, not the vehicle you prepped.
If you ran the EMP Charges prep, your escape gets two more tools: trigger the blackout from the SecuroServ app on your phone and slip out with the lights and cameras down, and use the extra staircase it opens between the exhibition and the basement to shortcut the climb. And if the run went loud, remember the rule from the stealth section: the police wait outside, and losing them is part of finishing.
The Elite Challenge
The elite challenge pays GTA$ 50,000 on normal and GTA$ 100,000 on hard, and it has to be done in a single clean run: a checkpoint restart ends the attempt (and the checkpoint alarm trap in the bugs section usually ends it anyway). The conditions:
Condition | Target |
|---|---|
Time | Finish in under 17:00 |
Accuracy | Above 90% |
Loot condition | Keep value loss low |
Buyer's Request | Secure the full set |
Two honest notes. First, the exact value-loss threshold is unclear, and runs with meaningful loss have still passed, so do not sweat a single scrape: just avoid taking sustained fire with a loaded bag. Second, the Buyer's Request condition means solo elite is RNG-gated: if a requested item rolls inside the two-player Exhibit Level 2 room, that run cannot go elite alone. Check the request during the scope out and relaunch your plan around it.
Route-wise, the Loading Bay is the easy answer for the timer, while the Skylight has a proven solo full-stealth elite pedigree. Either works; what matters is a rehearsed vault keypad (the practice replica pays for itself here) and a clean laser room.
Bugs and Workarounds
The checkpoint alarm trap. Restarting from a checkpoint, or dying and respawning after you are inside the building, can put you back with the alarm already active, and your undetected status cannot be recovered except by quitting and relaunching the finale from scratch. Death barely costs loot, so this mostly matters when you are chasing the elite or the no-spot awards: for those runs, a full relaunch beats a tainted checkpoint every time.
The Annihilator pilot crash. Covered in the escape section: the pilot can crash during the roof pickup, with or without Advanced Avionics. Pick another getaway, or self-extract by car.
Guard blips not showing. The Guard Routes prep's minimap blips can fail to appear on some runs. Play as if they might vanish.
Police alerted at the very end of a clean run. A "police alerted" result can land even after an apparently spotless stealth run. Fully clean escapes are absolutely achievable, so treat this as a can-happen, not a rule, and wipe the vault footage regardless.
Solo vs Group
The finale is fully solo-viable: a clean solo first run of the week regularly lands around GTA$ 2,000,000–2,200,000 all-in.
What a crew changes is the ceiling, not the floor. Every extra player is another bag of secondaries, and the two-player room on Exhibit Level 2 comes into play. On paper a four-player crew with a fully scoped board is looking at something above GTA$ 4,000,000, but bag limits mean no real run carries out everything the board values, so treat that as a ceiling, not a plan.
The money split is fixed, so decide who hosts before anyone launches. There are no percentage cuts to negotiate: the host banks the take, and helpers are paid a flat fee of roughly GTA$ 100,000, with joiner takes in practice landing around GTA$ 100,000–200,000. On a clean first-weekly run that leaves the host walking away with around GTA$ 2,000,000 while everyone else earns a hand-wave of it, so a fair crew rotates hosting week to week.
Hard Mode, Awards, and Career Progress
Hard mode only exists on replays. It triggers one way: pay the GTA$ 100,000 fee and relaunch within about 15 minutes of Raf's call after your previous run. There is no way to start a fresh weekly run on hard, which means every hard run is a same-week replay whose primary has already been slashed to around GTA$ 400,000, and the roughly 10 percent hard bonus applies to that reduced take, never to the first-weekly millions. Hard also does not restore the first-run premium. Net result: hard is worth about GTA$ 40,000–50,000 extra on the primary, and the real draw is the doubled elite bonus of GTA$ 100,000. It is a sweetener for farming runs, not a payout play. It is also not one-life: you can go down and keep the run alive, though the finale does run on a limited pool of lives, and running out fails it.
What actually changes inside on hard is still being verified; the laser room's extra low laser (and the lever that removes it) is the concrete change we have so far.
The awards worth planning runs around:
Award | Requirement | Bonus |
|---|---|---|
First completion | Finish the finale once | GTA$ 200,000 |
Masterpiece | Complete the elite challenge | GTA$ 200,000 |
Go Hard | Finish on hard without losing a life | Unconfirmed |
One Man Job | Finish solo | GTA$ 100,000 |
Team Player | Finish with four players | Unconfirmed |
Who's There? | Finish without being spotted | Unconfirmed |
Peace & Quiet | Finish without killing anyone | Unconfirmed |
Dirty Work | Sewer entry, no hazmat suit, never spotted | Unconfirmed |
On keeping paintings: the finale lets you keep certain primary paintings for your mansion collection instead of selling, but keeping one forfeits its entire sale value, and which paintings are keepable looks painting-dependent, so treat the option case by case. The reason to do it at all is Career Progress: Tier 4 asks for GTA$ 50,000,000 stolen, 15 platinum awards, an elite completion, and five kept paintings, and pays out the Armored Caracara. If you are chasing it, keep the fatigued repeat-run copies, never the first-weekly GTA$ 1,900,000-class copy.
What We're Still Confirming
Living-guide honesty box: these are the open items we are actively testing, and this section shrinks as answers land.
The exact vault thermal-sensor timer, and how much the Agency, Terrorbyte, and Garment Factory contacts extend it.
The elite challenge's real value-loss threshold (flat amount or percentage).
Which primary paintings can be kept versus must be sold.
The full list of what hard mode changes inside the building, and the exact wording and cash amounts of the Go Hard and Team Player awards.
The size of the shared lives pool.
Whether items left "on loan" from a previous run can break the Buyer's Request.
A rumored focus-and-ping workaround for the Annihilator pilot crash; unverified, so it is not in the escape section yet.
Our own first-hand pass: entrance-by-entrance captures, payout screens, and a mapped Skylight route.
Kortz Center Heist Finale FAQ
What is the best entrance for the Kortz Center Heist finale?
The Loading Bay for speed and repeat runs: you drive in disguised and start next to the basement, skipping most of the building. The Skylight suits elite and stealth-award hunters, the Sewer exists for the Dirty Work award, and the Staff Entrance is the forgiving first-run default. The full breakdown is in the entrances section above.
How do you get through the laser room?
Use the three deactivation panels: each one kills the lasers you have already passed, so the room is three short segments, not one long one. Switch to first person to judge the gaps, learn the remapped jump and crouch-in-place controls before you commit, and do not plan on tanking hits: you cannot eat snacks inside the grid, and a couple of touches can kill you.
How does the vault keypad hack work?
It is a memory puzzle: three rounds of flashing symbol sets you repeat back, with a maximum of about five attempts, and replaying a sequence costs an attempt. The GTA$ 450,000 Vault Keypad extra on the planning board is a practice replica for exactly this hack, and it is worth rehearsing before an elite attempt.
Is there a cooldown on the Kortz Center Heist finale?
Rerunning it is gated by Raf's call: after the finale, he phones when you can launch again, and the wait varies. Replays cost a GTA$ 100,000 fee (your first run is free) and pay a fraction of the first weekly run, and relaunching within about 15 minutes of his call starts the replay on hard mode.
How does the payout split work with a crew?
There are no cuts to set. The host banks the take, helpers get a flat fee of roughly GTA$ 100,000, and joiner takes land around GTA$ 100,000–200,000 in practice. Rotate the host role if you run it weekly as a crew.
Can you do the finale solo?
Yes, 1–4 players and fully solo-viable, with clean solo first-weekly runs landing around GTA$ 2,000,000–2,200,000. The one hard limit: the Exhibit Level 2 room needs two players, so its loot, and any Buyer's Request item that rolls inside it, is out of reach alone.
What is the elite challenge in the Kortz Center Heist?
Finish in under 17:00 with above 90 percent accuracy, keep loot value loss low, and secure the full Buyer's Request, all in a single run without checkpoint restarts. It pays GTA$ 50,000 on normal and GTA$ 100,000 on hard.
How do you unlock hard mode?
Replay within about 15 minutes of Raf's call, paying the GTA$ 100,000 fee. That is the only trigger: there is no hard option on a fresh weekly run. It adds roughly 10 percent to an already-reduced replay primary, so play it for the doubled elite bonus, not the base payout.
Do you have to use the getaway vehicle?
No. The prepped getaway is a convenience, not a requirement: you can reach the street, steal or call in any car, and drive the loot to Alec's lockup in Cypress Flats. With the Annihilator pilot's crash bug still live, self-extracting is often the safer play.
Is Advanced Avionics worth buying for the finale?
Only if the Annihilator Stealth is your getaway and you plan to replay the heist; it improves the helicopter's handling on the way out. Be aware the pilot crash bug happens with and without it, so it is not a fix for that.
Can you keep the paintings instead of selling them?
Some primaries can be kept for your mansion collection, but keeping one forfeits its whole sale value, and keepability looks painting-dependent. Keep cheap repeat-run copies if you are chasing the five kept paintings Career Progress Tier 4 requires; always sell the first-weekly copy.
Why is the alarm already going when I restart from a checkpoint?
That is the finale's most common trap: checkpoint restarts and post-entry deaths can resume the run with the alarm active, and undetected status cannot be recovered. If you are chasing the elite or a no-spot award, quit and relaunch the finale from scratch instead of taking the checkpoint.